Military Auto Coverage: Special Options for Service Members
Service members face insurance challenges most civilians never encounter. Deployments, relocations, and extended absences create gaps that standard auto policies don’t address.
At H&K Insurance Agency, we’ve helped countless military families navigate military auto coverage options designed specifically for their unique situations. This guide walks you through discounts, specialized protections, and strategies to lock in the best rates for your service.
Military Discounts and Special Programs
USAA dominates-but it’s not always the cheapest option
USAA remains the most recognized military insurance brand, offering overseas coverage, storage discounts up to 20% during deployment, and on-base discounts up to 15%. However, real data from military communities shows USAA isn’t universally the best choice. Service members frequently report switching to competitors like Geico or Progressive after decades of loyalty and save $500 to $1,000 annually. One veteran noted that a 10-year-old vehicle cost nearly half its value in annual premiums with USAA, while a competing quote cut that in half.
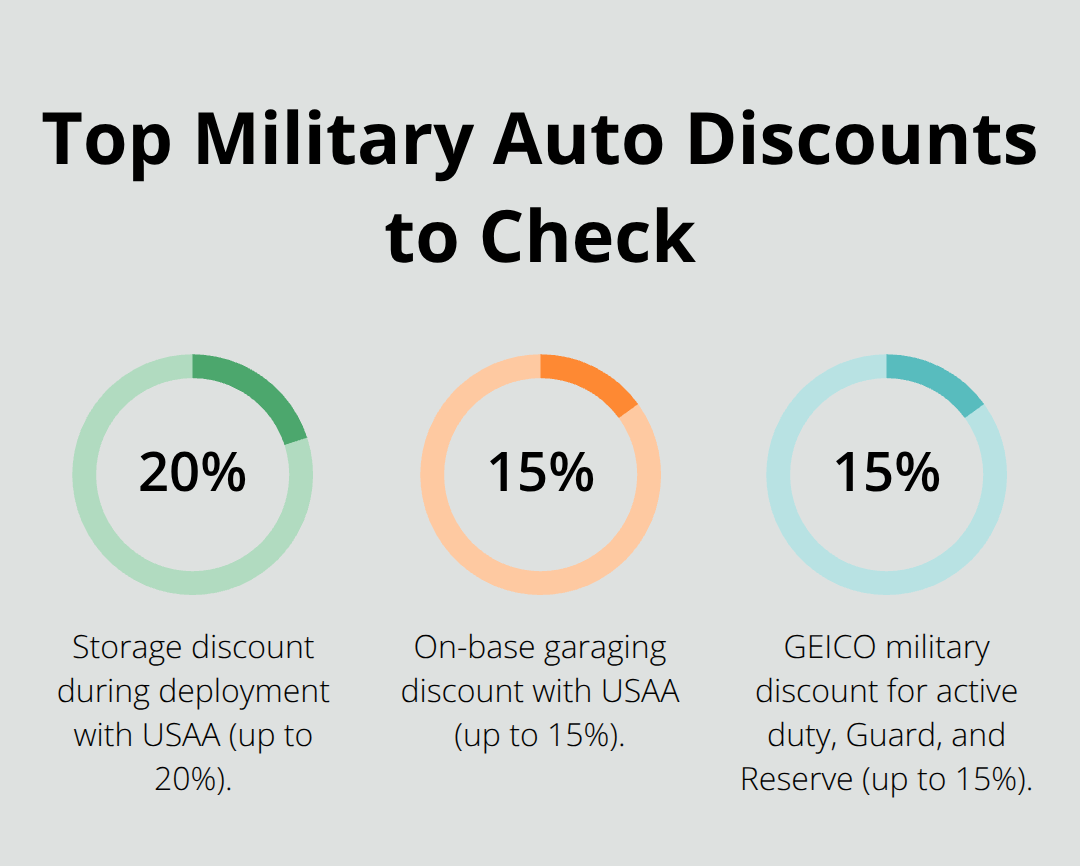
The lesson is blunt: brand loyalty costs money. GEICO’s Military Center serves active duty, Guard, and Reserve members with military discounts up to 15% and emergency deployment discounts. Navy Federal members access Liberty Mutual discounts, though savings vary by region.
Regional pricing and vehicle age shift your actual costs
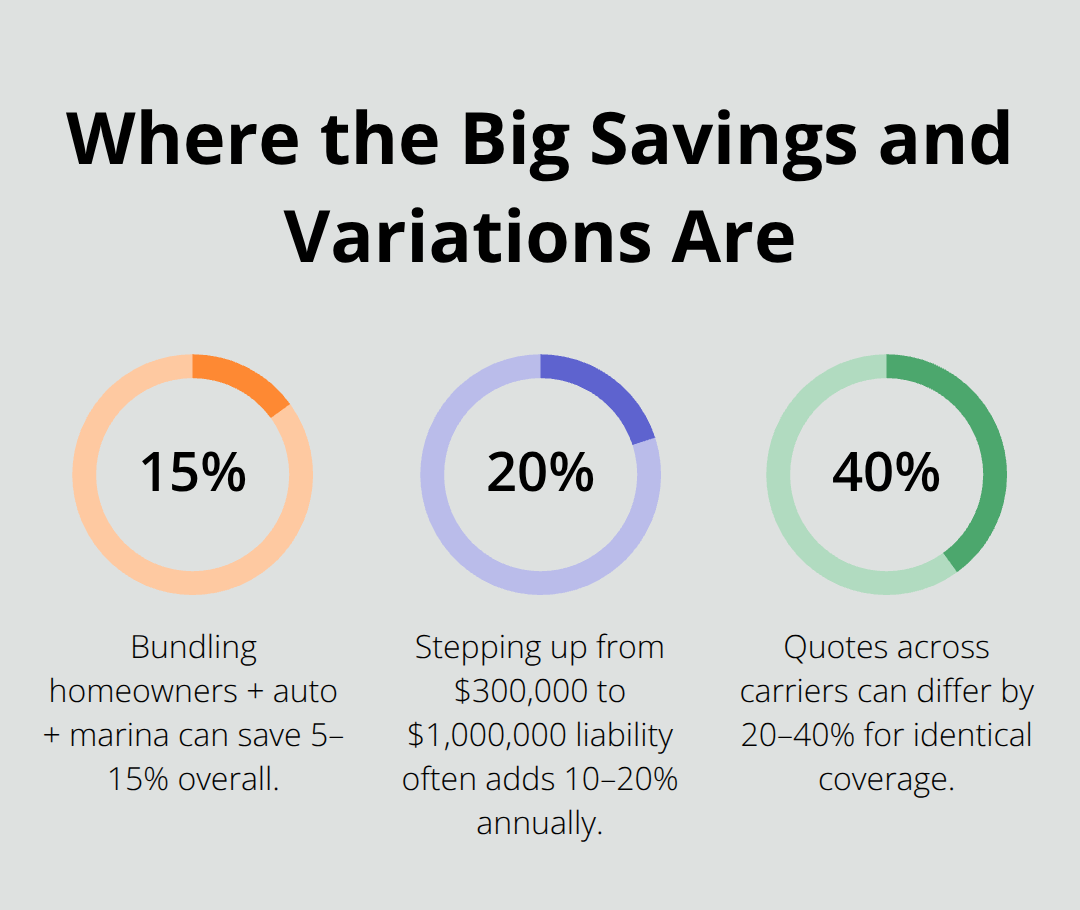
Regional pricing differences are dramatic. A policy costing $1,200 annually in one state might cost $1,800 in another with the same coverage. Storage discounts matter only if you’re deploying; for stationed personnel, on-base garaging discounts (up to 15%) or usage-based programs like GEICO’s SafePilot (up to 30% off renewal for safe driving in select states) deliver real value. If your vehicle is older or low-value, liability-only coverage slashes premiums compared to full coverage. Bundle discounts-auto with homeowners or renters insurance-save up to 10% with major carriers.
How to compare and find better rates
Quote annually or every two years across at least four carriers. Many service members work with local brokers rather than going direct to one company, which surfaces better pricing and catches regional discounts you’d miss alone. Family member coverage extends to spouses and relatives living in your home, but each insurer structures these differently, so confirm what’s covered when you add dependents to your policy. Since H&K Insurance Agency represents multiple top local and national carriers, we compare rates across USAA, Geico, Progressive, State Farm, and Allstate side by side to find what actually works for your situation, not what’s most famous.
Understanding coverage for your family and dependents
Your policy covers you, your spouse, relatives living in your home, and other licensed drivers with permission to drive your insured vehicle. Each carrier applies these rules differently, so gaps can appear when you add family members or rotate who drives what vehicle. Confirm coverage limits with your agent before deployment or relocation, especially if your spouse will manage the vehicle while you’re stationed elsewhere. These details matter more when your family is spread across multiple states or when you’re overseas.
The right military auto insurance adapts as your service changes-whether you’re deploying, relocating, or transitioning to civilian life. Understanding how discounts, regional pricing, and family coverage work positions you to move forward with confidence. Next, we’ll examine the specialized protections that address deployment, extended absences, and international coverage.
Deployment and Extended Absence: What Your Insurance Must Cover
Storage discounts apply only when your vehicle truly sits unused
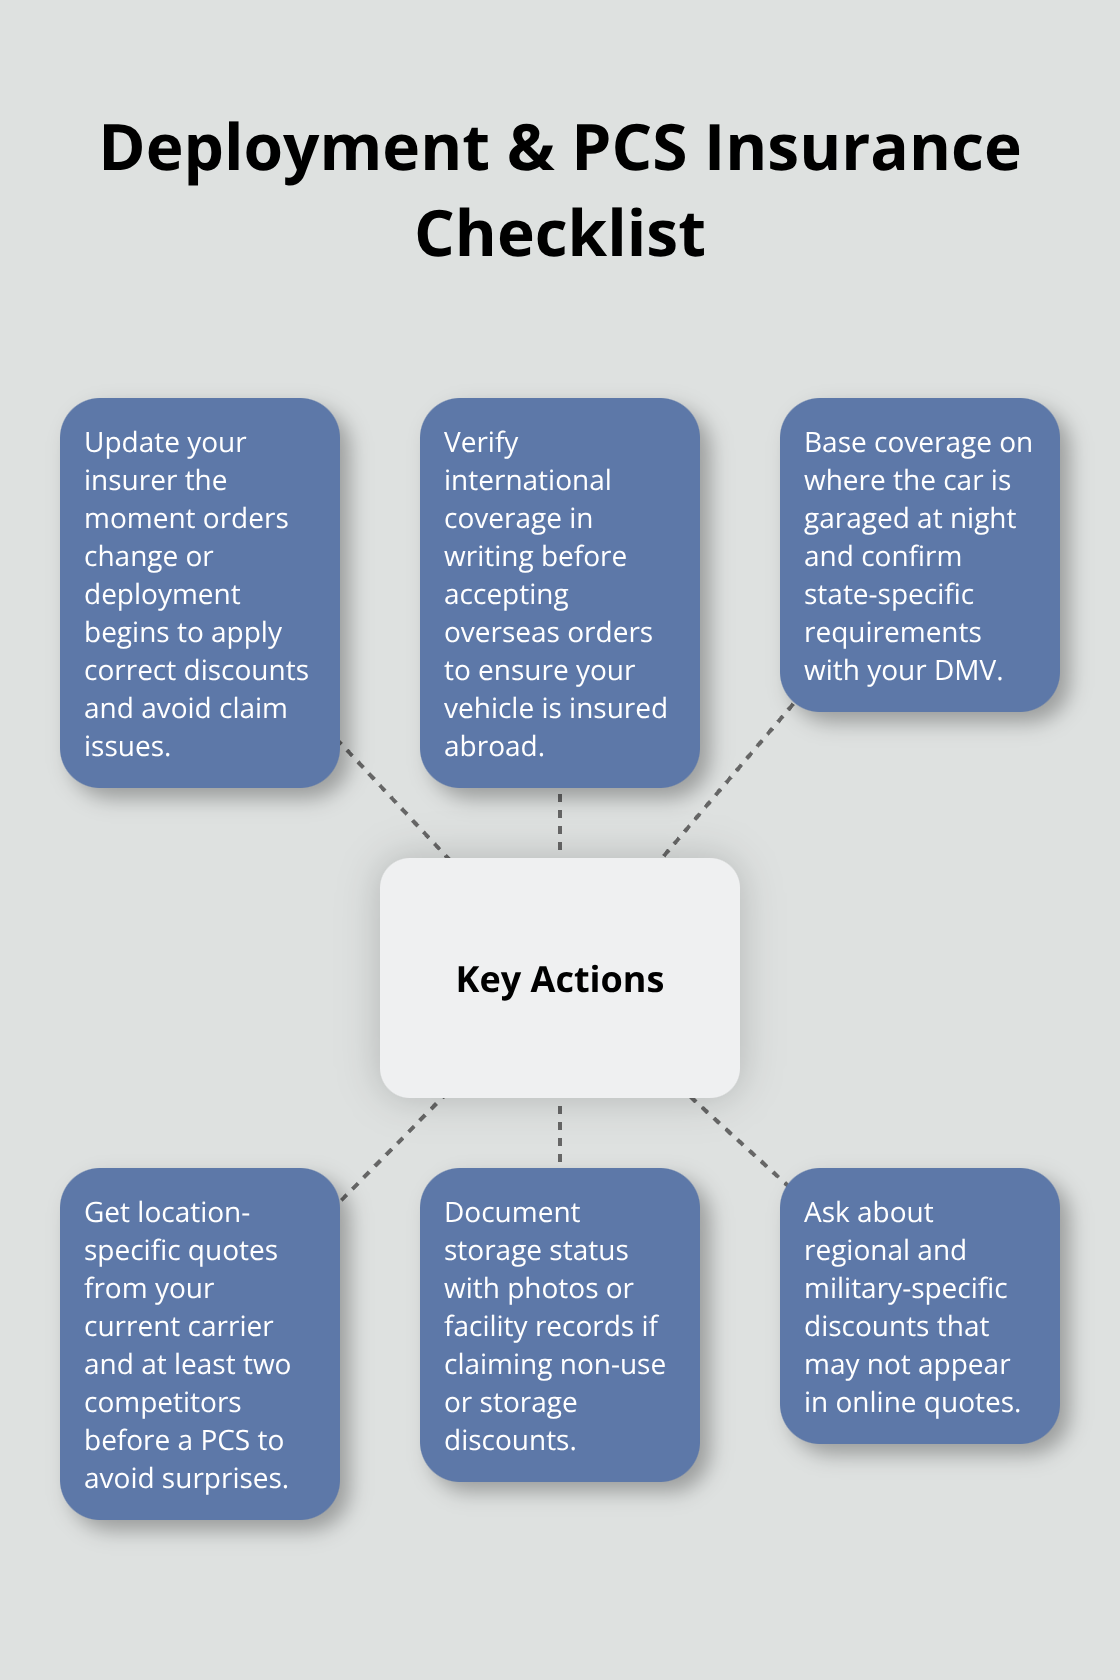
USAA offers storage discounts up to 60% when you store your vehicle in a secure location without driving it, though North Carolina and Virginia exclude this benefit. The critical distinction lies in how you apply it. If your vehicle sits unused for three months during a posting change, you qualify. If you’re stationed somewhere and drive regularly, you don’t. Claiming a storage discount on a regularly driven vehicle invites claims denial later. The moment your orders change or deployment begins, contact your insurer to update your status. GEICO’s Emergency Deployment Discount applies specifically to service members deployed in support of declared U.S. military emergency deployments, though the savings amount varies by region and policy type.
Overseas stations require explicit international coverage
International coverage becomes non-negotiable once you receive orders overseas. USAA explicitly covers service members deployed or stationed outside the United States, while GEICO’s worldwide coverage applies wherever you’re stationed. Most standard policies from other carriers don’t automatically extend overseas, which means your vehicle could sit uninsured the moment you receive orders to Germany, Japan, or the Middle East. Before accepting an overseas assignment, verify that your current insurer covers international locations and request written confirmation of that coverage.
State changes shift your coverage requirements and costs
When you relocate to a new state, verify coverage requirements with your local DMV because liability and uninsured motorist minimums shift by jurisdiction. The practical rule that works for military families: base your auto insurance on the state where your car parks at night. If you’re stationed in Washington but your vehicle lives in your home state, clarify with your insurer whether coverage follows the car’s actual location or your registration state. Military orders often waive standard state registration requirements, which simplifies this process if you provide documentation to your carrier.
Regional pricing swings demand advance rate comparisons
Before any permanent change of station, request a quote from your current insurer for the new location and compare it against at least two competitors in that state. Regional pricing swings mean your $1,200 annual premium in one state could jump to $1,800 in another, even with identical coverage. This variation reflects state-specific claims data, repair costs, and regulatory requirements rather than policy differences. Getting quotes before your move prevents sticker shock when your orders arrive and gives you time to adjust your coverage or switch carriers if necessary.
Vehicle storage and non-use discounts require documentation
Storage discounts demand proof that your vehicle remains in a secure location and isn’t driven. Your insurer may require photos, storage facility documentation, or periodic check-ins to confirm the vehicle’s status. If you plan to store your vehicle during deployment, notify your insurer in writing and ask what documentation they need. Some carriers adjust your premium immediately; others wait until renewal. Clarify this timeline so you don’t overpay for coverage you’re not using.
The transition from stateside service to overseas posting or from one state to another tests your insurance setup. Next, we’ll examine how to compare quotes across multiple carriers and select coverage limits that actually protect your family’s finances.
How to Find the Right Military Auto Insurance
Quote four carriers and repeat every two years
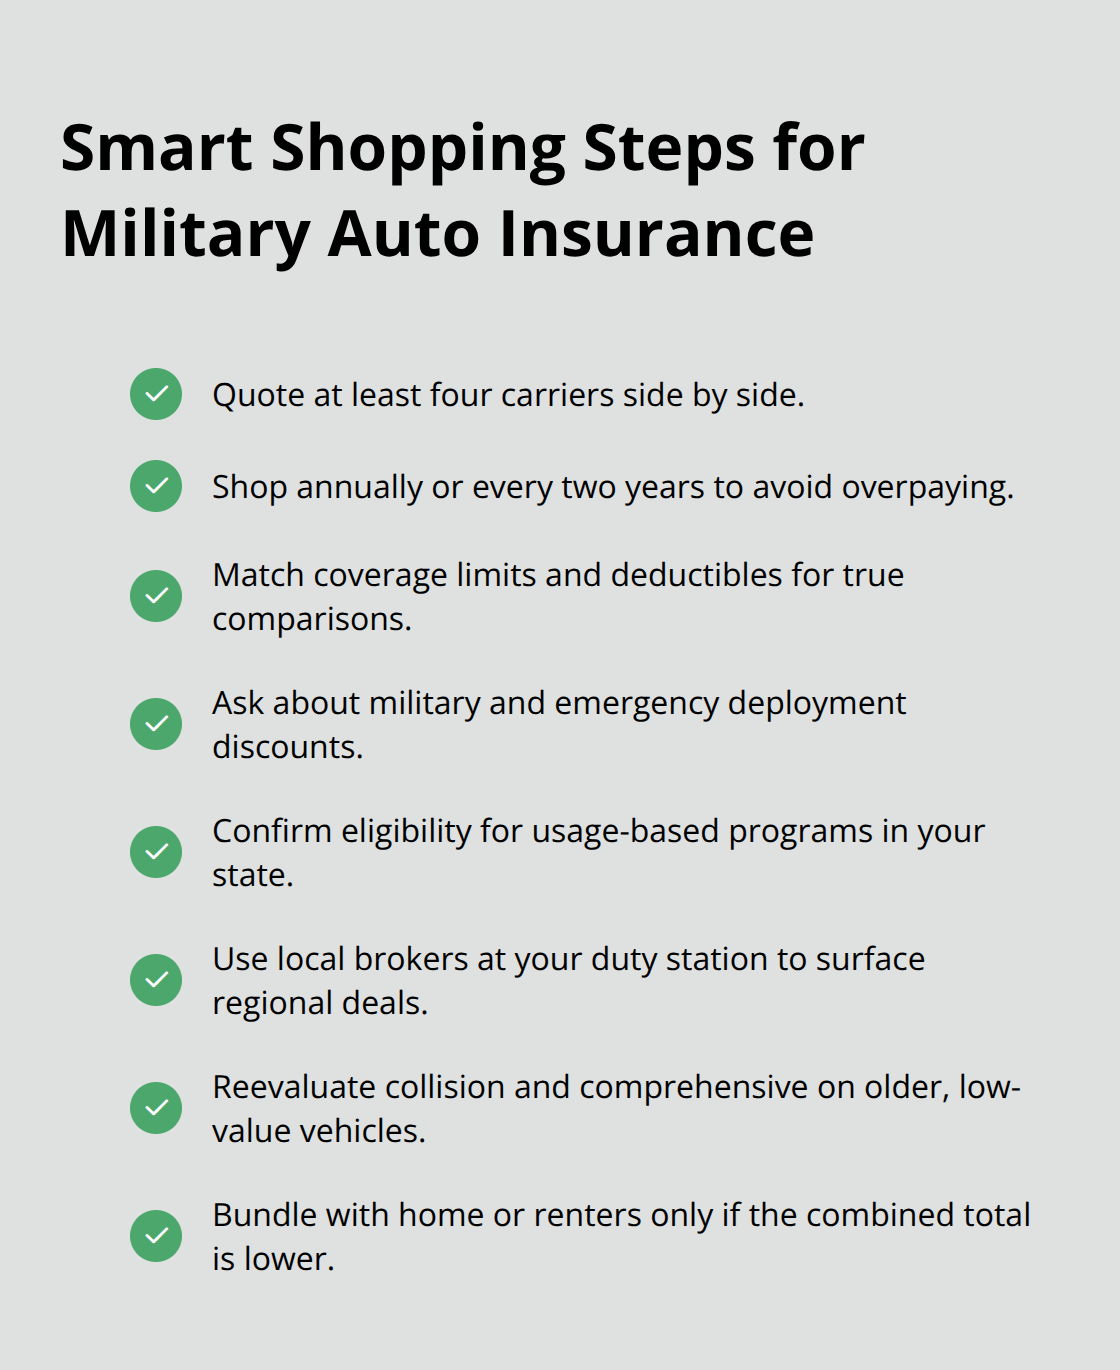
Service members who stick with one insurer for five years often pay 20 to 30 percent more than those who shop annually. Request quotes for identical coverage limits and deductibles across USAA, Geico, Progressive, State Farm, and Allstate so you compare apples to apples, not different deductible levels that mask real price differences. When you obtain a quote, ask specifically about military discounts, emergency deployment discounts, and any usage-based programs available in your state. Rate swings are substantial and unpredictable, which makes annual or biennial shopping non-negotiable if you want to avoid overpaying.
Evaluate usage-based programs and state-specific discounts
Geico’s SafePilot program reduces renewal premiums by up to 30 percent for safe driving in select states, but it requires a smartphone app and isn’t available everywhere, so confirm eligibility before assuming it applies to you. USAA’s flexible payment aligns with military pay cycles and storage discounts reach up to 60 percent during deployment, though storage discounts vanish the moment your vehicle moves back into regular use. Local brokers in your duty station often access regional carriers and discounts you won’t find online, and they handle quote comparison across multiple companies without charging you a fee.
Select coverage limits that protect your household assets
Coverage limits matter more than you think because underinsuring creates financial exposure your paycheck can’t absorb. Most states require minimum liability coverage of $25,000 for bodily injury per person and $50,000 per accident, but that coverage evaporates fast if you cause a serious multi-vehicle wreck. Military families with dependents should carry at least $100,000 in bodily injury coverage and $300,000 in combined single limits to protect household assets from judgment claims.
Decide on collision and comprehensive based on vehicle value
Collision and comprehensive coverage become optional once your vehicle reaches 10 years old and drops below $10,000 in value, though the decision depends on your emergency fund and risk tolerance. If you can absorb a $5,000 loss without borrowing, dropping collision coverage on an older vehicle cuts your annual premium by 30 to 40 percent. This calculation shifts dramatically if you carry a loan on the vehicle-your lender requires full coverage regardless of age or value.
Bundle auto with home or renters insurance strategically
Bundling auto with homeowners or renters insurance saves up to 10 percent across major carriers, but verify the bundled rate actually beats what you’d pay separately because some insurers price bundles aggressively only for new customers. Compare the bundled total against separate quotes from the same carrier and at least one competitor to confirm you’re actually saving money rather than accepting a discount that masks higher base rates.
Final Thoughts
Military auto coverage demands more than picking the most recognizable brand. Service members who shop annually save hundreds to thousands of dollars, while those who stay loyal to one insurer often overpay by 20 to 30 percent. Your deployment status, vehicle age, state of residence, and family structure all shift your actual costs and coverage needs in ways that generic policies miss.
Request quotes from at least four carriers for identical coverage limits and deductibles before a permanent change of station, before deployment, and every two years during stateside service. Compare military discounts, emergency deployment protections, and storage benefits side by side rather than assuming one carrier offers the best deal everywhere. Regional pricing swings mean your premium could jump 30 to 50 percent when you move states, and rate increases from your current insurer happen silently unless you shop around.
H&K Insurance Agency represents multiple top local and national carriers, which means we compare rates across USAA, Geico, Progressive, State Farm, and Allstate to find what actually works for your military situation. We identify regional discounts and bundling opportunities you would miss shopping alone, and we customize military auto coverage that adapts as your service changes. Contact us today to get competitive rates without the guesswork.